


 Tech-led.com


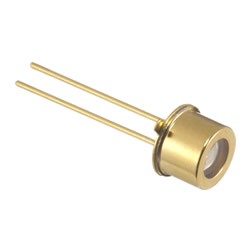
IR & NIR LED
IR & NIR LEDs – High-Efficiency Infrared LED Solutions (700 nm – 1050 nm)
Near-infrared LEDs (often shortened to NIR LEDs) and IR LEDs emit light just beyond the red edge of the visible spectrum, where the eye’s sensitivity falls off steeply (some wavelengths still show a faint red glow). The CIE divides infrared radiation into three bands:
| Band | Wavelength | Common use cases |
|---|---|---|
| IR-A (near-infrared) | 780 – 1400 nm | Night-vision, biometric cameras, pulse oximetry, sensing |
| IR-B | 1400 – 3000 nm | Fiber-optic links, moisture sensing (see our SWIR LED line) |
| IR-C | 3 µm – 1 mm | Thermal imaging |
The IR & NIR LEDs in the catalog cover 700 to 1050 nm: the far-red edge (700–780 nm) and the shorter-wavelength part of IR-A. Wavelengths from 1050 to 1900 nm are on our SWIR LED page.
(Sunlight at sea level delivers ~527 W/m2 of infrared energy—proof of IR’s power and prevalence.)
Why Choose These Near-Infrared LEDs?
- High radiant output – Up to 6 W in compact SMBB and EDC packages.
- Tight wavelength bins – 730 nm, 780 nm, 810 nm, 850 nm, 940 nm ± 5 nm for repeatable sensor design.
- Thermal paths that scale – Ceramic SMBB for board-level designs; TO-66 arrays for flood illuminators.
Applications for Infrared & NIR LEDs
- Security cameras & facial-recognition floodlights
- Medical pulse-oximetry & photobiomodulation research
- LiDAR / time-of-flight ranging
- Plastic & moisture sorting in industrial automation
For wavelengths above 1000 nm—including 1050 nm, 1300 nm and 1550 nm - please visit our SWIR LED page.
EDC
| Product # | Discontinued? | Datasheet | Wavelength (nm) | Package Type | Package Size | Forward IF(mA) Current | Total Radiated Power Po(mW) | Viewing HalfAngleΘ1/2 (degree) |
|---|---|---|---|---|---|---|---|---|
| EDC1050GD-1100-S5 | No |

|
1050 | SMD | 3.5mm x 3.5mm | 1000 | 750 | 39 |
SMBB
| Product # | Discontinued? | Datasheet | Wavelength (nm) | Package Type | Package Size | Forward IF(mA) Current | Total Radiated Power Po(mW) | Viewing HalfAngleΘ1/2 (degree) |
|---|---|---|---|---|---|---|---|---|
| SMBB1050GD-1100 | No |
|
1050 | SMD | 5mm x 5mm | 1000 | 700 | 64 |
| SMBB1050GD-1100-05 | No |
|
1050 | SMD | 5mm x 5mm | 1000 | 750 | 44 |
| SMBB1050GD-1100-03 | No |
|
1050 | SMD | 5mm x 5mm | 1000 | 750 | 23 |
| SMBB1050GD-1100-02 | No |
|
1050 | SMD | 5mm x 5mm | 1000 | 750 | 10 |
| SMBB1050S-1100-02NRND | No |
|
1050 | SMD | 5mm x 5mm | 500 | 52 | 10 |
| SMBB1200S-1100NRND | No |
|
1200 | SMD | 5mm x 5mm | 500 | 50 | 68 |
| SMBB1200S-1100-02NRND | No |
|
1200 | SMD | 5mm x 5mm | 500 | 50 | 9 |
| SMBB1200S-1100-05NRND | No |
|
1200 | SMD | 5mm x 5mm | 500 | 50 | 53 |
| SMBB1300S-1100NRND | No |
|
1300 | SMD | 5mm x 5mm | 500 | 45 | 68 |
| SMBB1300S-1100-02NRND | No |
|
1300 | SMD | 5mm x 5mm | 500 | 45 | 10 |
| SMBB1450S-1100NRND | No |
|
1450 | SMD | 5mm x 5mm | 500 | 25 | 67 |
| SMBB1550S-1100NRND | No |
|
1550 | SMD | 5mm x 5mm | 500 | 20 | 68 |
| SMBB1550S-1100-02NRND | No |
|
1550 | SMD | 5mm x 5mm | 500 | 20 | 10 |
| SMBB1650S-1100NRND | No |
|
1650 | SMD | 5mm x 5mm | 500 | 16 | 68 |
| SMBB870D-1100 | No |
|
870 | SMD | 5mm x 5mm | 1000 | 650 | 65 |
| SMBB830D-1100 | No |
|
830 | SMD | 5mm x 5mm | 1000 | 700 | 64 |
| SMBB830D-1100-02 | No |
|
830 | SMD | 5mm x 5mm | 1000 | 700 | 9 |
| SMBB830D-1100-03 | No |
|
830 | SMD | 5mm x 5mm | 1000 | 700 | 23 |
| SMBB830D-1100-05 | No |
|
830 | SMD | 5mm x 5mm | 1000 | 700 | 44 |
| SMBB850D-1100 | No |
|
850 | SMD | 5mm x 5mm | 1000 | 780 | 65 |
| SMBB880D-1100 | No |
|
880 | SMD | 5mm x 5mm | 1000 | 750 | 65 |
| SMBB880D-1100-02 | No |
|
880 | SMD | 5mm x 5mm | 800 | 610 | 9 |
| SMBB880D-1100-05 | No |
|
880 | SMD | 5mm x 5mm | 1000 | 750 | 44 |
| SMBB880D-1100-03 | No |
|
880 | SMD | 5mm x 5mm | 800 | 610 | 23 |
| SMBB970D-1100 | No |
|
970 | SMD | 5mm x 5mm | 1000 | 780 | 65 |
NRND: Not Recommended for New Design
SMT
| Product # | Discontinued? | Datasheet | Wavelength (nm) | Package Type | Package Size | Forward IF(mA) Current | Total Radiated Power Po(mW) | Viewing HalfAngleΘ1/2 (degree) |
|---|---|---|---|---|---|---|---|---|
| SMT890D | No |
|
890 | SMD | 3.5mm x 2.8mm | 50 | 25 | 62 |
| SMT735D | No |
|
745 | SMD | 3.5mm x 2.8mm | 50 | 35 | 61 |
| SMT880D | No |
|
890 | SMD | 3.5mm x 2.8mm | 50 | 28 | 62 |
| SMT850D-S1 | No |
|
850 | SMD | 3.5mm x 2.8mm | 50 | 26 | 8 |
| SMT850N-S1NRND | No |

|
850 | SMD | 3.5mm x 2.8mm | 50 | 26 | 10* |
| SMT940D-29 | No |
|
940 | SMD | 3.5mm x 2.8mm | 50 | 30 | 46 |
| SMT940D-27 | No |
|
940 | SMD | 3.5mm x 2.8mm | 50 | 30 | 35 |
| SMT940D-25 | No |
|
940 | SMD | 3.5mm x 2.8mm | 50 | 30 | 20* |
| SMT1050GD-29 | No |
|
1050 | SMD | 3.5mm x 2.8mm | 50 | 30 | 43 |
| SMT1050GD-25 | No |
|
1050 | SMD | 3.5mm x 2.8mm | 50 | 30 | 26 |
| SMT1070D | No |
|
1070 | SMD | 3.5mm x 2.8mm | 50 | 10 | 61 |
| SMT1300S-S1NRND | No |
|
1300 | SMD | 3.5mm x 2.8mm | 50 | 9 | 12 |
| SMT1450S-S1NRND | No |
|
1450 | SMD | 3.5mm x 2.8mm | 50 | 4.8 | 10 |
| SMT1550S | No |
|
1550 | SMD | 3.5mm x 2.8mm | 50 | 2.7 | 65 |
| SMT1550S-S1NRND | No |
|
1550 | SMD | 3.5mm x 2.8mm | 50 | 3 | 9 |
| SMT1650S-23NRND | No |
|
1650 | SMD | 3.5mm x 2.8mm | 50 | 2 | 20 |
| SMT1650S-S1NRND | No |
|
1650 | SMD | 3.5mm x 2.8mm | 50 | 2 | 10* |
| SMT1650S | No |
|
1650 | SMD | 3.5mm x 2.8mm | 50 | 1.7 | 64 |
| SMT720-S1 | No |
|
720 | SMD | 3.5mm x 2.8mm | 20 | 7 | 10* |
| SMT720-29 | No |
|
720 | SMD | 3.5mm x 2.8mm | 20 | 7 | 45* |
| SMT720-27 | No |
|
720 | SMD | 3.5mm x 2.8mm | 20 | 7 | 29* |
| SMT720-25 | No |
|
720 | SMD | 3.5mm x 2.8mm | 20 | 7 | 20* |
| SMT720-23 | No |
|
720 | SMD | 3.5mm x 2.8mm | 20 | 7 | 16* |
| SMT700-S1 | No |
|
700 | SMD | 3.5mm x 2.8mm | 20 | 5.5 | 10* |
| SMT700-29 | No |
|
700 | SMD | 3.5mm x 2.8mm | 20 | 5.5 | 45* |
| SMT700-27 | No |
|
700 | SMD | 3.5mm x 2.8mm | 20 | 5.5 | 29* |
| SMT700-25 | No |
|
700 | SMD | 3.5mm x 2.8mm | 20 | 5.5 | 20* |
| SMT700-23 | No |
|
700 | SMD | 3.5mm x 2.8mm | 20 | 5.5 | 17 |
| SMT700 | No |
|
700 | SMD | 3.5mm x 2.8mm | 20 | 5.5 | 63 |
| SMT700D | No |
|
700 | SMD | 3.5mm x 2.8mm | 50 | 40 | 62 |
| SMT720 | No |
|
720 | SMD | 3.5mm x 2.8mm | 20 | 7 | 64 |
| SMT720D | No |
|
720 | SMD | 3.5mm x 2.8mm | 50 | 38 | 62 |
| SMT735-S1 | No |
|
735 | SMD | 3.5mm x 2.8mm | 50 | 25 | 10* |
| SMT735-29 | No |
|
735 | SMD | 3.5mm x 2.8mm | 50 | 25 | 45* |
| SMT735-27 | No |
|
735 | SMD | 3.5mm x 2.8mm | 50 | 25 | 29* |
| SMT735-25 | No |
|
735 | SMD | 3.5mm x 2.8mm | 50 | 25 | 20* |
| SMT735-23 | No |
|
735 | SMD | 3.5mm x 2.8mm | 50 | 25 | 14 |
| SMT735 | No |
|
735 | SMD | 3.5mm x 2.8mm | 50 | 25 | 63 |
| SMT735D-S1 | No |
|
735 | SMD | 3.5mm x 2.8mm | 50 | 35 | 8 |
| SMT740 | No |
|
740 | SMD | 3.5mm x 2.8mm | 50 | 27 | 63 |
| SMT740D | No |
|
740 | SMD | 3.5mm x 2.8mm | 50 | 38 | 62 |
| SMT750 | No |
|
750 | SMD | 3.5mm x 2.8mm | 50 | 25 | 63 |
| SMT750D | No |
|
750 | SMD | 3.5mm x 2.8mm | 50 | 40 | 62 |
| SMT750-23 | No |
|
750 | SMD | 3.5mm x 2.8mm | 50 | 25 | 14 |
| SMT750-25 | No |
|
750 | SMD | 3.5mm x 2.8mm | 50 | 20 | 20 |
| SMT750-S1 | No |
|
750 | SMD | 3.5mm x 2.8mm | 50 | 25 | 10* |
| SMT750-29 | No |
|
750 | SMD | 3.5mm x 2.8mm | 50 | 25 | 45* |
| SMT750-27 | No |
|
750 | SMD | 3.5mm x 2.8mm | 50 | 20 | 28 |
| SMT760 | No |
|
760 | SMD | 3.5mm x 2.8mm | 50 | 27 | 63 |
| SMT770D | No |
|
770 | SMD | 3.5mm x 2.8mm | 50 | 35 | 61 |
| SMT760D | No |
|
760 | SMD | 3.5mm x 2.8mm | 50 | 35 | 61 |
| SMT760-S1 | No |
|
760 | SMD | 3.5mm x 2.8mm | 50 | 27 | 10* |
| SMT760-27 | No |
|
760 | SMD | 3.5mm x 2.8mm | 50 | 27 | 29* |
| SMT760-25 | No |
|
760 | SMD | 3.5mm x 2.8mm | 50 | 27 | 20* |
| SMT760-23 | No |
|
760 | SMD | 3.5mm x 2.8mm | 50 | 27 | 16* |
| SMT760-29 | No |
|
760 | SMD | 3.5mm x 2.8mm | 50 | 27 | 43 |
| SMT770-S1 | No |
|
770 | SMD | 3.5mm x 2.8mm | 50 | 26 | 10* |
| SMT770-29 | No |
|
770 | SMD | 3.5mm x 2.8mm | 50 | 26 | 45* |
| SMT770-27 | No |
|
770 | SMD | 3.5mm x 2.8mm | 50 | 26 | 29* |
| SMT770-25 | No |
|
770 | SMD | 3.5mm x 2.8mm | 50 | 26 | 20* |
| SMT770-23 | No |
|
770 | SMD | 3.5mm x 2.8mm | 50 | 26 | 16* |
| SMT770 | No |
|
770 | SMD | 3.5mm x 2.8mm | 50 | 26 | 63 |
| SMT780 | No |
|
780 | SMD | 3.5mm x 2.8mm | 50 | 24 | 63 |
| SMT780-23 | No |
|
780 | SMD | 3.5mm x 2.8mm | 50 | 24 | 18 |
| SMT780-25 | No |
|
780 | SMD | 3.5mm x 2.8mm | 50 | 24 | 22 |
| SMT780-27 | No |
|
780 | SMD | 3.5mm x 2.8mm | 50 | 24 | 27 |
| SMT780-29 | No |
|
780 | SMD | 3.5mm x 2.8mm | 50 | 24 | 42 |
| SMT830N | No |
|
830 | SMD | 3.5mm x 2.8mm | 50 | 25 | 64 |
| SMT840 | No |
|
840 | SMD | 3.5mm x 2.8mm | 50 | 26 | 62 |
| SMT840D | No |
|
840 | SMD | 3.5mm x 2.8mm | 50 | 28 | 64 |
| SMT850D-29 | No |
|
850 | SMD | 3.5mm x 2.8mm | 50 | 26 | 45* |
| SMT810D-S1 | No |
|
810 | SMD | 3.5mm x 2.8mm | 50 | 25 | 8 |
| SMT810D-22 | No |
|
810 | SMD | 3.5mm x 2.8mm | 50 | 25 | 12 |
| SMT850D-25 | No |
|
850 | SMD | 3.5mm x 2.8mm | 50 | 26 | 20* |
| SMT850D-27 | No |
|
850 | SMD | 3.5mm x 2.8mm | 50 | 26 | 29* |
| SMT850D | No |
|
850 | SMD | 3.5mm x 2.8mm | 50 | 26 | 61 |
| SMT850D-22 | No |
|
850 | SMD | 3.5mm x 2.8mm | 50 | 26 | 13 |
| SMT850D-23 | No |
|
850 | SMD | 3.5mm x 2.8mm | 50 | 26 | 18 |
| SMT850N | No |
|
850 | SMD | 3.5mm x 2.8mm | 50 | 28 | 63 |
| SMT850N-23NRND | No |
|
850 | SMD | 3.5mm x 2.8mm | 50 | 28 | 13 |
| SMT850N-27NRND | No |
|
850 | SMD | 3.5mm x 2.8mm | 50 | 28 | 35 |
| SMT850N-25NRND | No |
|
850 | SMD | 3.5mm x 2.8mm | 50 | 28 | 20 |
| SMT850N-29NRND | No |
|
850 | SMD | 3.5mm x 2.8mm | 50 | 28 | 45 |
| SMT870-23NRND | No |
|
870 | SMD | 3.5mm x 2.8mm | 50 | 28 | 14 |
| SMT870N-S1NRND | No |
|
870 | SMD | 3.5mm x 2.8mm | 50 | 28 | 10* |
| SMT870N-29NRND | No |
|
870 | SMD | 3.5mm x 2.8mm | 50 | 28 | 45* |
| SMT870N-27NRND | No |
|
870 | SMD | 3.5mm x 2.8mm | 50 | 28 | 26 |
| SMT870N-25NRND | No |
|
870 | SMD | 3.5mm x 2.8mm | 50 | 28 | 22 |
| SMT870N-23NRND | No |
|
870 | SMD | 3.5mm x 2.8mm | 50 | 28 | 14 |
| SMT870N | No |
|
870 | SMD | 3.5mm x 2.8mm | 50 | 28 | 63 |
| SMT870D-S1 | No |
|
870 | SMD | 3.5mm x 2.8mm | 50 | 30 | 8 |
| SMT880-S1NRND | No |
|
880 | SMD | 3.5mm x 2.8mm | 50 | 25 | 10* |
| SMT880-29NRND | No |
|
880 | SMD | 3.5mm x 2.8mm | 50 | 25 | 45* |
| SMT880-27NRND | No |
|
880 | SMD | 3.5mm x 2.8mm | 50 | 25 | 26 |
| SMT880-25NRND | No |
|
880 | SMD | 3.5mm x 2.8mm | 50 | 25 | 22 |
| SMT880-23NRND | No |
|
880 | SMD | 3.5mm x 2.8mm | 50 | 25 | 13 |
| SMT880 | No |
|
880 | SMD | 3.5mm x 2.8mm | 50 | 25 | 63 |
| SMT890-S1 | No |
|
890 | SMD | 3.5mm x 2.8mm | 50 | 15 | 10* |
| SMT890-29 | No |
|
890 | SMD | 3.5mm x 2.8mm | 50 | 15 | 45* |
| SMT890-27 | No |
|
890 | SMD | 3.5mm x 2.8mm | 50 | 15 | 29* |
| SMT890-25 | No |
|
890 | SMD | 3.5mm x 2.8mm | 50 | 15 | 20* |
| SMT890-23 | No |
|
890 | SMD | 3.5mm x 2.8mm | 50 | 15 | 13 |
| SMT890 | No |
|
890 | SMD | 3.5mm x 2.8mm | 50 | 15 | 63 |
| SMT910-S1 | No |
|
910 | SMD | 3.5mm x 2.8mm | 50 | 13 | 10* |
| SMT910-29 | No |
|
910 | SMD | 3.5mm x 2.8mm | 50 | 13 | 45* |
| SMT910-27 | No |
|
910 | SMD | 3.5mm x 2.8mm | 50 | 13 | 29* |
| SMT910-25 | No |
|
910 | SMD | 3.5mm x 2.8mm | 50 | 13 | 20* |
| SMT910-23 | No |
|
910 | SMD | 3.5mm x 2.8mm | 50 | 13 | 16* |
| SMT910 | No |
|
910 | SMD | 3.5mm x 2.8mm | 50 | 13 | 63 |
| SMT940 | No |
|
940 | SMD | 3.5mm x 2.8mm | 50 | 15 | 64 |
| SMT940-23 | No |
|
940 | SMD | 3.5mm x 2.8mm | 50 | 15 | 20 |
| SMT940-S1 | No |
|
940 | SMD | 3.5mm x 2.8mm | 50 | 15 | 10 |
| SMT940-29 | No |
|
940 | SMD | 3.5mm x 2.8mm | 50 | 15 | 46 |
| SMT940-27 | No |
|
940 | SMD | 3.5mm x 2.8mm | 50 | 15 | 35 |
| SMT940-25 | No |
|
940 | SMD | 3.5mm x 2.8mm | 50 | 17 | 23 |
| SMT940D | No |
|
940 | SMD | 3.5mm x 2.8mm | 50 | 30 | 61 |
| SMT940D-23 | No |
|
940 | SMD | 3.5mm x 2.8mm | 50 | 30 | 20 |
| SMT940D-S1 | No |
|
940 | SMD | 3.5mm x 2.8mm | 50 | 30 | 8 |
| SMT970-25 | No |
|
970 | SMD | 3.5mm x 2.8mm | 50 | 7 | 26 |
| SMT970-27 | No |
|
970 | SMD | 3.5mm x 2.8mm | 50 | 7 | 35 |
| SMT970-S1 | No |
|
970 | SMD | 3.5mm x 2.8mm | 50 | 7 | 10 |
| SMT970 | No |
|
970 | SMD | 3.5mm x 2.8mm | 50 | 7 | 64 |
| SMT970-23 | No |
|
970 | SMD | 3.5mm x 2.8mm | 50 | 6 | 12 |
| SMT970-25 | No |
|
970 | SMD | 3.5mm x 2.8mm | 50 | 6 | 26 |
| SMT970-29 | No |
|
970 | SMD | 3.5mm x 2.8mm | 50 | 7 | 49 |
| SMT970D | No |
|
970 | SMD | 3.5mm x 2.8mm | 50 | 28 | 62 |
| SMT970D-S1 | No |
|
970 | SMD | 3.5mm x 2.8mm | 50 | 30 | 10* |
| SMT970D-29 | No |
|
970 | SMD | 3.5mm x 2.8mm | 50 | 30 | 45* |
| SMT970D-27 | No |
|
970 | SMD | 3.5mm x 2.8mm | 50 | 30 | 29* |
| SMT970D-25 | No |
|
970 | SMD | 3.5mm x 2.8mm | 50 | 30 | 20* |
| SMT970D-23 | No |
|
970 | SMD | 3.5mm x 2.8mm | 50 | 30 | 20 |
| SMT980D-S1 | No |
|
980 | SMD | 3.5mm x 2.8mm | 50 | 30 | 10* |
| SMT980D-29 | No |
|
980 | SMD | 3.5mm x 2.8mm | 50 | 30 | 45* |
| SMT980D-27 | No |
|
980 | SMD | 3.5mm x 2.8mm | 50 | 30 | 29* |
| SMT980D-25 | No |
|
980 | SMD | 3.5mm x 2.8mm | 50 | 30 | 20* |
| SMT980D-23 | No |
|
980 | SMD | 3.5mm x 2.8mm | 50 | 30 | 16* |
| SMT980D-22 | No |
|
980 | SMD | 3.5mm x 2.8mm | 50 | 30 | 12 |
| SMT980D | No |
|
980 | SMD | 3.5mm x 2.8mm | 50 | 30 | 62 |
NRND: Not Recommended for New Design
Through-Hole
| Product # | Discontinued? | Datasheet | Wavelength (nm) | Package Type | Package Size | Forward IF(mA) Current | Total Radiated Power Po(mW) | Viewing HalfAngleΘ1/2 (degree) | Package Diameter |
|---|---|---|---|---|---|---|---|---|---|
| L1200S-01 | No |
|
1200 | Mold | Φ5mm | 50 | 9.2 | 10* | |
| L1200S-02 | No |
|
1200 | Mold | Φ5mm | 50 | 9 | 8* | |
| L1200S-04 | No |
|
1200 | Mold | Φ5mm | 50 | 9.2 | 17* | |
| L1200S-05NRND | No |
|
1200 | Mold | Φ5mm | 50 | 9 | 44* | |
| L1200S-06 | No |
|
1200 | Mold | Φ5mm | 50 | 9.2 | 4* | |
| L1200S-09 | No |
|
1200 | Mold | Φ5mm | 50 | 9.2 | 10_21* | |
| L1200D-33 | No |
|
1200 | mold | Φ3mm | 50 | 10 | 16 | |
| L1200S-34 | No |
|
1200 | Mold | Φ3mm | 50 | 9.2 | - | |
| L1200S-31NRND | No |
|
1200 | Mold | Φ3mm | 50 | 9.2 | - | |
| L1200S-33 | No |
|
1200 | mold | Φ3mm | 50 | 9.2 | 23 | |
| L1200S-36 | No |
|
1200 | mold | Φ3mm | 50 | 9.2 | 35 | |
| L1200S-03 | No |
|
1200 | mold | Φ5mm | 50 | 9.2 | 14 | |
| L1200S-33 | No |
|
1200 | mold | Φ3mm | 50 | 9.2 | 23 | |
| L1300S-01 | No |
|
1300 | mold | Φ5mm | 50 | 9 | 13 | |
| L1300S-02 | No |
|
1300 | mold | Φ5mm | 50 | 9 | 10 | |
| L1300S-04 | No |
|
1300 | mold | Φ5mm | 50 | 9 | 21 | |
| L1300S-05NRND | No |
|
1300 | mold | Φ5mm | 50 | 9 | 35 | |
| L1300S-06 | No |
|
1300 | mold | Φ5mm | 50 | 9 | 9 | |
| L1300S-09 | No |
|
1300 | Mold | Φ5mm | 50 | 9 | 10_21* | |
| L1300S-33 | No |
|
1300 | mold | Φ3mm | 50 | 9 | 23 | |
| L1300S-36 | No |
|
1300 | mold | Φ3mm | 50 | 9 | 34 | |
| L1300S-03 | No |
|
1300 | mold | Φ5mm | 50 | 9 | 13 | |
| L1300S-31NRND | No |
|
1300 | Mold | Φ3mm | 50 | 9 | - | |
| L1450S-01 | No |
|
1450 | Mold | Φ5mm | 50 | 4 | 10* | |
| L1450S-02 | No |
|
1450 | Mold | Φ5mm | 50 | 4 | 8* | |
| L1450S-03 | No |
|
1450 | mold | Φ5mm | 50 | 4.8 | 14 | |
| L1450S-04 | No |
|
1450 | Mold | Φ5mm | 50 | 4 | 17* | |
| L1450S-05NRND | No |
|
1450 | Mold | Φ5mm | 50 | 4 | 37 | |
| L1450S-06 | No |
|
1450 | mold | Φ5mm | 50 | 4.8 | 9 | |
| L1450S-09 | No |
|
1450 | Mold | Φ5mm | 50 | 4 | 4* | |
| L1450S-33 | No |
|
1450 | mold | Φ3mm | 50 | 4.8 | 23 | |
| L1450S-34 | No |
|
1450 | Mold | Φ3mm | 50 | 4.8 | - | |
| L1450S-36 | No |
|
1450 | mold | Φ3mm | 50 | 4.8 | 35 | |
| L1550D-01 | No |
|
1550 | Mold | Φ5mm | 50 | 4.3 | 11 | |
| L1550D-02 | No |
|
1550 | Mold | Φ5mm | 50 | 4.3 | 3 | |
| L1550D-03 | No |
|
1550 | Mold | Φ5mm | 50 | 4.3 | 14 | |
| L1550D-04 | No |
|
1550 | MOLD | Φ5mm | 50 | 4.3 | 10 | |
| L1550D-05NRND | No |
|
1550 | Mold | Φ5mm | 50 | 3.7 | 40 | |
| L1550D-06 | No |
|
1550 | Mold | Φ5mm | 50 | 4.3 | 3 | |
| L1550D-09 | No |
|
1550 | Mold | Φ5mm | 50 | 4.3 | 14_28 | |
| L1550D-34 | No |
|
1550 | Mold | Φ3mm | 50 | 4.3 | 7 | |
| L1550D-31NRND | No |
|
1550 | Mold | Φ3mm | 50 | 3.7 | 26 | |
| L1550D-33 | No |
|
1550 | Mold | Φ3mm | 50 | 4.3 | 20 | |
| L1550D-36 | No |
|
1550 | Mold | Φ3mm | 50 | 4.3 | 58 | |
| L1550S-01 | No |
|
1550 | mold | Φ5mm | 50 | 3.8 | 16 | |
| L1550S-02 | No |
|
1550 | mold | Φ5mm | 50 | 3.8 | 9 | |
| L1550S-03 | No |
|
1550 | mold | Φ5mm | 50 | 3.8 | 13 | |
| L1550S-04 | No |
|
1550 | mold | Φ5mm | 50 | 3.8 | 24 | |
| L1550S-05NRND | No |
|
1550 | mold | Φ5mm | 50 | 3.8 | 35 | |
| L1550S-06 | No |
|
1550 | mold | Φ5mm | 50 | 3.8 | 9 | |
| L1550S-33 | No |
|
1550 | mold | Φ3mm | 50 | 3.8 | 22 | |
| L1550S-36 | No |
|
1550 | mold | Φ3mm | 50 | 3.8 | 36 | |
| L1650D-01 | No |
|
1650 | Mold | Φ5mm | 50 | 2.3 | 11 | |
| L1650D-02 | No |
|
1650 | Mold | Φ5mm | 50 | 2.3 | 3 | |
| L1650D-03 | No |
|
1650 | Mold | Φ5mm | 50 | 2.3 | 14 | |
| L1650D-05NRND | No |
|
1650 | Mold | Φ5mm | 50 | 2 | 40 | |
| L1650D-06 | No |
|
1650 | Mold | Φ5mm | 50 | 2.3 | 3 | |
| L1650D-33 | No |
|
1650 | Mold | Φ3mm | 50 | 2.3 | 20 | |
| L1650D-36 | No |
|
1650 | Mold | Φ3mm | 50 | 2.3 | 58 | |
| L1650S-03 | No |
|
1650 | mold | Φ5mm | 50 | 2.3 | 12 | |
| L1650S-36 | No |
|
1650 | mold | Φ3mm | 50 | 2.3 | 33 | |
| L680-01AUNRND | No |
|
680 | Mold | Φ5mm | 20 | 5 | 10 | |
| L680-02AUNRND | No |
|
680 | Mold | Φ5mm | 20 | 5.8 | 3 | |
| L680-03AUNRND | No |
|
680 | Mold | Φ5mm | 20 | 5.8 | 9 | |
| L680-04AUNRND | No |
|
680 | Mold | Φ5mm | 20 | 8 | 12 | |
| L680-05AUNRND | No |
|
680 | Mold | Φ5mm | 20 | 5.8 | 44* | |
| L680-06AUNRND | No |
|
680 | Mold | Φ5mm | 20 | 8 | 7 | |
| L680-09AUNRND | No |
|
680 | Mold | Φ5mm | 20 | 5.8 | 10_21* | |
| L680-33AUNRND | No |
|
680 | Mold | Φ3mm | 20 | 5.8 | 16 | |
| L680-36AUNRND | No |
|
680 | Mold | Φ3mm | 20 | 5.8 | 19 | |
| L700-01AU | No |
|
700 | Mold | Φ5mm | 20 | 5.5 | 10 | 5 |
| L700-02AU | No |
|
700 | Mold | Φ5mm | 20 | 5.5 | 8 | 5 |
| L700-03AU | No |
|
700 | Mold | Φ5mm | 20 | 5.5 | 9 | 5 |
| L700-04AU | No |
|
700 | Mold | Φ5mm | 20 | 5.5 | 16 | 5 |
| L700-05AUNRND | No |
|
700 | Mold | Φ5mm | 50 | 14 | 40 | 5 |
| L700-06AU | No |
|
700 | Mold | Φ5mm | 20 | 5.5 | 4 | 5 |
| L700-09AU | No |
|
700 | Mold | Φ5mm | 20 | 5.5 | 10_21* | 5 |
| L700-33AU | No |
|
700 | Mold | Φ3mm | 20 | 5.5 | 19 | 3 |
| L700-36AU | No |
|
700 | Mold | Φ3mm | 20 | 5.5 | 23 | 3 |
| L710-33AUNRND | No |
|
710 | Mold | Φ3mm | 20 | 6 | 16 | 5 |
| L710-04AUNRND | No |
|
710 | Mold | Φ5mm | 20 | 6 | 16 | 5 |
| L710-03AUNRND | No |
|
710 | Mold | Φ5mm | 20 | 6 | 10 | 5 |
| L710-01AUNRND | No |
|
710 | Mold | Φ5mm | 20 | 6 | 9 | 5 |
| L720-01AU | No |
|
720 | mold | Φ5mm | 20 | 7 | 9 | 5 |
| L720-02AU | No |
|
720 | Mold | Φ5mm | 20 | 7 | 3 | 5 |
| L720-03AU | No |
|
720 | Mold | Φ5mm | 20 | 7 | 9 | 5 |
| L720-04AU | No |
|
720 | Mold | Φ5mm | 20 | 7 | 13 | 5 |
| L720-05AUNRND | No |
|
720 | Mold | Φ5mm | 20 | 7 | 44* | 5 |
| L720-06AU | No |
|
720 | Mold | Φ5mm | 50 | 22 | 7 | 5 |
| L720-09AU | No |
|
720 | Mold | Φ5mm | 20 | 7 | 10_21* | 5 |
| L720-33AU | No |
|
720 | Mold | Φ3mm | 20 | 7 | 20 | 3 |
| L720-36AU | No |
|
720 | Mold | Φ3mm | 20 | 7 | 23 | 3 |
| L735-01AU | No |
|
735 | Mold | Φ5mm | 50 | 25 | 10 | 5 |
| L735-02AU | No |
|
735 | Mold | Φ5mm | 50 | 25 | 8 | 5 |
| L735-03AU | No |
|
735 | Mold | Φ5mm | 50 | 100 | 8 | 5 |
| L735-04AU | No |
|
735 | Mold | Φ5mm | 50 | 42 | 19 | 5 |
| L735-05AUNRND | No |
|
735 | Mold | Φ5mm | 50 | 25 | 46 | 5 |
| L735D-05 | No |
|
735 | Mold | Φ5mm | 50 | 30 | 42 | 5 |
| L735-06-55 | No |
|
735 | Mold | Φ5mm | - | - | - | |
| L735-06AU | No |
|
735 | Mold | Φ5mm | 50 | 25 | 6 | 5 |
| L735-09AU | No |
|
735 | Mold | Φ5mm | 50 | 25 | 10_21* | 5 |
| L735-33AU | No |
|
735 | Mold | Φ3mm | 50 | 40 | 15 | 3 |
| L735-36AU | No |
|
735 | Mold | Φ3mm | 50 | 32 | 23 | 3 |
| L740-02AU | No |
|
740 | Mold | Φ5mm | 50 | 27 | 7 | 5 |
| L740-03AU | No |
|
740 | Mold | Φ5mm | 50 | 27 | 10 | 5 |
| L740-05AUNRND | No |
|
740 | Mold | Φ5mm | 50 | 27 | 44* | 5 |
| L740-06AU | No |
|
740 | Mold | Φ5mm | 50 | 27 | 6 | 5 |
| L740-09AU | No |
|
740 | Mold | Φ5mm | 50 | 27 | 10_21* | 5 |
| L740-33AU | No |
|
740 | Mold | Φ3mm | 50 | 27 | 18 | 3 |
| L740-36AU | No |
|
740 | Mold | Φ3mm | 50 | 27 | 28 | 3 |
| L750-01AU | No |
|
750 | Mold | Φ5mm | 50 | 25 | 11 | 5 |
| L750-02AU | No |
|
750 | Mold | Φ5mm | 50 | 25 | 7 | 5 |
| L750-03AU | No |
|
750 | Mold | Φ5mm | 50 | 18 | 15 | 5 |
| L750-05AUNRND | No |
|
750 | Mold | Φ5mm | 50 | 23 | 47 | 5 |
| L750-06AU | No |
|
750 | Mold | Φ5mm | 50 | 25 | 9 | 5 |
| L750-31AUNRND | No |
|
750 | Mold | Φ3mm | 50 | 23 | 43 | 3 |
| L750-33AU | No |
|
750 | Mold | Φ3mm | 50 | 23 | 17 | 3 |
| L750-36AU | No |
|
750 | Mold | Φ3mm | 50 | 25 | 25 | 3 |
| L760-01AU | No |
|
1100 | Mold | Φ5mm | 50 | 24 | 8 | 5 |
| L760D-03 | No |
|
760 | Mold | Φ5mm | 50 | 35 | 12 | 5 |
| L760-02AU | No |
|
760 | Mold | Φ5mm | 50 | 27 | 4 | 5 |
| L760-03AU | No |
|
760 | Mold | Φ5mm | 50 | 27 | 10 | 5 |
| L760-04AU | No |
|
760 | Mold | Φ5mm | 50 | 27 | 25 | 5 |
| L760-05AUNRND | No |
|
760 | Mold | Φ5mm | 50 | 18 | 44 | 5 |
| L760-09AU | No |
|
760 | Mold | Φ5mm | 50 | 27 | 10_21* | 5 |
| L760-33AU | No |
|
760 | Mold | Φ3mm | 50 | 27 | 18 | 3 |
| L760D-33 | No |
|
760 | Mold | Φ3mm | 50 | 35 | 15 | 3 |
| L760-36AU | No |
|
760 | Mold | Φ3mm | 50 | 27 | 26 | 3 |
| L760D-36 | No |
|
760 | Mold | Φ3mm | 50 | 35 | 46 | 3 |
| L770-01AU | No |
|
770 | Mold | Φ5mm | 50 | 26 | 11 | 5 |
| L770-02AU | No |
|
770 | Mold | Φ5mm | 50 | 26 | 8 | 5 |
| L770-03AU | No |
|
770 | Mold | Φ5mm | 50 | 26 | 10 | 5 |
| L770-04AU | No |
|
770 | Mold | Φ5mm | 50 | 25 | 17 | 5 |
| L770-05AUNRND | No |
|
770 | Mold | Φ5mm | 50 | 26 | 44* | 5 |
| L770-06AU | No |
|
770 | Mold | Φ5mm | 50 | 26 | 7 | 5 |
| L770-09AU | No |
|
770 | Mold | Φ5mm | 50 | 26 | 10_21* | 5 |
| L770-33AU | No |
|
770 | Mold | Φ3mm | 50 | 26 | 18 | 3 |
| L770-36AU | No |
|
770 | Mold | Φ3mm | 50 | 26 | 30 | 3 |
| L780D-09 | No |
|
780 | Mold | Φ5mm | 50 | 35 | 26_16 | |
| L780-02AU | No |
|
780 | Mold | Φ5mm | 50 | 24 | 9 | 5 |
| L780-03AU | No |
|
780 | Mold | Φ5mm | 50 | 24 | 10 | 5 |
| L780-04AU | No |
|
780 | Mold | Φ5mm | 50 | 28 | 17 | 5 |
| L780-05AUNRND | No |
|
780 | Mold | Φ5mm | - | - | - | |
| L780-06AU | No |
|
780 | Mold | Φ5mm | 50 | 24 | 8 | 5 |
| L780-09AU | No |
|
780 | Mold | Φ5mm | 50 | 28 | Long:23 Short:11 | |
| L780-33AU | No |
|
780 | Mold | Φ3mm | 50 | 24 | 18 | 3 |
| L780-36AU | No |
|
780 | Mold | Φ3mm | 50 | 24 | 28 | 3 |
| L800-01AU | No |
|
800 | Mold | Φ5mm | 50 | 27 | 8 | 5 |
| L800-02AU | No |
|
800 | Mold | Φ5mm | 50 | 27 | 7 | 5 |
| L800-03AU | No |
|
800 | Mold | Φ5mm | 50 | 27 | 10 | 5 |
| L800-04AU | No |
|
800 | Mold | Φ5mm | 50 | 27 | 16 | 5 |
| L800-05AUNRND | No |
|
800 | Mold | Φ5mm | 50 | 22 | 44 | 5 |
| L800-06AU | No |
|
800 | Mold | Φ5mm | 50 | 27 | 4 | 5 |
| L800-09AU | No |
|
800 | Mold | Φ5mm | 50 | 27 | 10_21* | 5 |
| L800-33AU | No |
|
800 | Mold | Φ3mm | 50 | 27 | 18 | 3 |
| L800-36AU | No |
|
800 | Mold | Φ3mm | 50 | - | 28 | |
| L805-01AU | No |
|
805 | Mold | Φ5mm | 50 | 25 | 10* | 5 |
| L805-02AU | No |
|
805 | Mold | Φ5mm | 50 | 25 | 8* | 5 |
| L805-04AU | No |
|
805 | Mold | Φ5mm | 50 | 27 | 16 | 5 |
| L810-01AU | No |
|
810 | Mold | Φ5mm | 50 | 27 | 8 | 5 |
| L810-02AU | No |
|
810 | Mold | Φ5mm | 50 | 27 | 7 | 5 |
| L810-03AU | No |
|
810 | Mold | Φ5mm | 50 | 18 | 15 | 5 |
| L810-04AU | No |
|
810 | Mold | Φ5mm | 50 | 27 | 16 | 5 |
| L810-05AUNRND | No |
|
810 | Mold | Φ5mm | 50 | 20 | 48 | 5 |
| L810-06AU | No |
|
810 | Mold | Φ5mm | 50 | 27 | 8 | 5 |
| L810-09AU | No |
|
810 | Mold | Φ5mm | 50 | 24 | 10_21* | 5 |
| L810-33AU | No |
|
810 | Mold | Φ3mm | 50 | 22 | 18 | 3 |
| L810-36AU | No |
|
810 | Mold | Φ3mm | 50 | 24 | 29 | 3 |
| L810D-33 | No |
|
810 | Mold | Φ3mm | 50 | 25 | 3 | |
| L810D-36 | No |
|
810 | Mold | Φ3mm | 50 | 25 | 52 | 3 |
| L820-01AUNRND | No |
|
820 | Mold | Φ5mm | 50 | 25 | 10 | 5 |
| L820-02AUNRND | No |
|
820 | Mold | Φ5mm | 50 | 25 | 7 | 5 |
| L820-03AUNRND | No |
|
820 | Mold | Φ5mm | 50 | 25 | 10 | 5 |
| L820-04AUNRND | No |
|
820 | Mold | Φ5mm | 50 | 25 | 17 | 5 |
| L820-05AUNRND | No |
|
820 | Mold | Φ5mm | 50 | 25 | 44* | 5 |
| L820-06AUNRND | No |
|
820 | Mold | Φ5mm | 50 | 25 | 4* | 5 |
| L820-09AUNRND | No |
|
820 | Mold | Φ5mm | 50 | 25 | 10_21* | 5 |
| L820-33AUNRND | No |
|
820 | Mold | Φ3mm | 50 | 25 | 17 | 3 |
| L820-36AUNRND | No |
|
820 | Mold | Φ3mm | 50 | 25 | 26 | 3 |
| L830-01AU | No |
|
830 | Mold | Φ5mm | 50 | 18 | 10 | 5 |
| L830-02AU | No |
|
830 | Mold | Φ5mm | 50 | 27 | 4 | 5 |
| L830-03AU | No |
|
830 | Mold | Φ5mm | 50 | 27 | 10 | 5 |
| L830-03UPNRND | No |
|
830 | Mold | Φ5mm | 50 | 23 | 10 | 5 |
| L830-04AU | No |
|
830 | Mold | Φ5mm | 50 | 27 | 19 | 5 |
| L830-04UPNRND | No |
|
830 | Mold | Φ5mm | 50 | 24 | 19 | 5 |
| L830-05AUNRND | No |
|
830 | Mold | Φ5mm | 50 | 20 | 48 | 5 |
| L830-05UPNRND | No |
|
830 | Mold | Φ5mm | 50 | 22 | 44 | 5 |
| L830-06AU | No |
|
830 | Mold | Φ5mm | 50 | 27 | 4* | 5 |
| L830-09AU | No |
|
830 | Mold | Φ5mm | 50 | 28 | 10_21* | 5 |
| L830-33AU | No |
|
830 | Mold | Φ3mm | 50 | 27 | 18 | 3 |
| L830-33UPNRND | No |
|
830 | Mold | Φ3mm | 50 | 25 | 20 | 3 |
| L830-36AU | No |
|
830 | Mold | Φ3mm | 50 | 27 | 34 | 3 |
| L830-36UPNRND | No |
|
830 | Mold | Φ3mm | 50 | 25 | 30 | 3 |
| L840-01AU | No |
|
840 | Mold | Φ5mm | 50 | 18 | 10 | 5 |
| L840-02AU | No |
|
840 | Mold | Φ5mm | 50 | 26 | 8* | 5 |
| L840-03AU | No |
|
840 | Mold | Φ5mm | 50 | 26 | 10* | 5 |
| L840-04AU | No |
|
840 | Mold | Φ5mm | 50 | 20 | 20 | 5 |
| L840-05AUNRND | No |
|
840 | Mold | Φ5mm | 50 | 26 | 44* | 5 |
| L840-06AU | No |
|
840 | Mold | Φ5mm | 50 | 26 | 4* | 5 |
| L840-09AU | No |
|
840 | Mold | Φ5mm | 50 | 26 | 10_21* | 5 |
| L840-33AU | No |
|
840 | Mold | Φ3mm | 50 | 26 | 17* | 3 |
| L840-36AU | No |
|
840 | Mold | Φ3mm | 50 | 26 | 33 | 3 |
| L850-01UPNRND | No |
|
850 | Mold | Φ5mm | 50 | 22 | 10 | 5 |
| L850-02UPNRND | No |
|
850 | Mold | Φ5mm | 50 | 24 | 5 | 5 |
| L850-03UPNRND | No |
|
850 | Mold | Φ5mm | 50 | 24 | 13 | 5 |
| L850-04UPNRND | No |
|
850 | Mold | Φ5mm | 50 | 22 | 20 | 5 |
| L850-05UPNRND | No |
|
850 | Mold | Φ5mm | 50 | 22 | 40 | 5 |
| L850-06L6CU | No |
|
850 | Mold | Φ5mm | - | - | 4* | |
| L850-06UPNRND | No |
|
850 | Mold | Φ5mm | 50 | 22 | 7 | 5 |
| L850-09UPNRND | No |
|
850 | Mold | Φ5mm | 50 | 24 | 15_25 | 5 |
| L850-33UPNRND | No |
|
850 | Mold | Φ3mm | 50 | 24 | 15 | 3 |
| L850-36UPNRND | No |
|
850 | Mold | Φ3mm | 50 | 22 | 30 | 3 |
| L850D-01 | No |
|
850 | Mold | Φ5mm | 50 | 26 | 10 | 5 |
| L850D-03 | No |
|
850 | Mold | Φ5mm | 50 | 26 | 11 | 5 |
| L850D-04 | No |
|
850 | Mold | Φ5mm | 50 | 26 | 9 | 5 |
| L850D-06 | No |
|
850 | Mold | Φ5mm | 50 | 26 | 3 | 5 |
| L850D-33 | No |
|
850 | Mold | Φ3mm | 50 | 26 | 16 | 3 |
| L850D-34 | No |
|
850 | Mold | Φ3mm | 50 | 26 | 6 | 3 |
| L850D-36 | No |
|
850 | Mold | Φ3mm | 50 | 26 | 47 | 3 |
| L850F-01-55NRND | No |
|
850 | Mold | Φ5mm | - | - | 10 | |
| L850F-01UNRND | No |
|
850 | Mold | Φ5mm | 50 | 28 | 10* | 5 |
| L850F-02UNRND | No |
|
850 | Mold | Φ5mm | 50 | 28 | 8* | 5 |
| L850F-03-55NRND | No |
|
850 | Mold | Φ5mm | - | - | 15 | |
| L850F-03UNRND | No |
|
850 | Mold | Φ5mm | 50 | 28 | 10* | 5 |
| L850F-04UNRND | No |
|
850 | Mold | Φ5mm | 50 | 28 | 17* | 5 |
| L850F-05UNRND | No |
|
850 | Mold | Φ5mm | 50 | 28 | 44* | 5 |
| L850F-06-55NRND | No |
|
850 | Mold | Φ5mm | - | - | 10 | |
| L850F-06UNRND | No |
|
850 | Mold | Φ5mm | 50 | 28 | 4* | 5 |
| L850F-09UNRND | No |
|
850 | Mold | Φ5mm | 50 | 28 | 10_21* | 5 |
| L850F-33UNRND | No |
|
850 | Mold | Φ3mm | 50 | 28 | 17* | 3 |
| L850F-36UNRND | No |
|
850 | Mold | Φ3mm | 50 | 28 | 32* | 3 |
| L870-01UPNRND | No |
|
870 | Mold | Φ5mm | 50 | 28 | 11 | 5 |
| L870D-06 | No |
|
870 | Mold | Φ5mm | 50 | 30 | 3 | 5 |
| L870D-05 | No |
|
870 | Mold | Φ5mm | 50 | 24 | 42 | 5 |
| L870D-04 | No |
|
870 | Mold | Φ5mm | 50 | 30 | 9 | 5 |
| L870D-03 | No |
|
870 | Mold | Φ5mm | 50 | 30 | 11 | 5 |
| L870-02UPNRND | No |
|
870 | Mold | Φ5mm | 50 | 24 | 5 | 5 |
| L870-03UPNRND | No |
|
870 | Mold | Φ5mm | 50 | 22 | 15 | 5 |
| L870-04UPNRND | No |
|
870 | Mold | Φ5mm | 50 | 24 | 18 | 5 |
| L870-05UPNRND | No |
|
870 | Mold | Φ5mm | 50 | 22 | 44 | 5 |
| L870-06UPNRND | No |
|
870 | Mold | Φ5mm | 50 | 24 | 7 | 5 |
| L870-09UPNRND | No |
|
870 | Mold | Φ5mm | 50 | 28 | 10_21* | 5 |
| L870-33UPNRND | No |
|
870 | Mold | Φ3mm | 50 | 22 | 15 | 3 |
| L870D-33 | No |
|
870 | Mold | Φ3mm | 50 | 30 | 13 | 3 |
| L870-36UPNRND | No |
|
870 | Mold | Φ3mm | 50 | 28 | 30 | 3 |
| L870F-01UNRND | No |
|
870 | Mold | Φ5mm | 50 | 28 | 10* | 5 |
| L870F-02-55NRND | No |
|
870 | Mold | Φ5mm | 50 | 25 | 8* | |
| L870F-02UNRND | No |
|
870 | Mold | Φ5mm | 50 | 24 | 5 | 5 |
| L870F-03-55NRND | No |
|
870 | Mold | Φ5mm | 50 | 20 | 15 | 5 |
| L870F-03UNRND | No |
|
870 | Mold | Φ5mm | 50 | 24 | 15 | 5 |
| L870F-04-55NRND | No |
|
870 | Mold | Φ5mm | 50 | 25 | 22 | |
| L870F-04-55NRND | No |
|
870 | Mold | Φ5mm | 50 | 25 | 22 | 5 |
| L870F-04UNRND | No |
|
870 | Mold | Φ5mm | 50 | 24 | 20 | 5 |
| L870F-05-55NRND | No |
|
870 | Mold | Φ5mm | 50 | 25 | 44* | |
| L870F-05UNRND | No |
|
870 | Mold | Φ5mm | 50 | 28 | 44* | 5 |
| L870F-06-55NRND | No |
|
870 | Mold | Φ5mm | 100 | 46 | 10 | |
| L870F-06UNRND | No |
|
870 | Mold | Φ5mm | 50 | 24 | 7 | 5 |
| L870F-09UNRND | No |
|
870 | Mold | Φ5mm | 50 | 28 | 10_21* | 5 |
| L870F-33UNRND | No |
|
870 | Mold | Φ3mm | 50 | 28 | 17* | 3 |
| L870F-36UNRND | No |
|
870 | Mold | Φ3mm | 50 | 24 | 30 | 3 |
| L880-01AUNRND | No |
|
880 | Mold | Φ5mm | 50 | 25 | 11 | 5 |
| L880-02AUNRND | No |
|
880 | Mold | Φ5mm | 50 | 25 | 8 | 5 |
| L880-03AUNRND | No |
|
880 | Mold | Φ5mm | 50 | 25 | 10 | 5 |
| L880-04AUNRND | No |
|
880 | Mold | Φ5mm | 50 | 22 | 18 | 5 |
| L880-05AUNRND | No |
|
880 | Mold | Φ5mm | 50 | 25 | 44* | 5 |
| L880-06AUNRND | No |
|
880 | Mold | Φ5mm | 50 | 25 | 8 | 5 |
| L880-09AUNRND | No |
|
880 | Mold | Φ5mm | 50 | 25 | 10_21* | 5 |
| L880-33AUNRND | No |
|
880 | Mold | Φ3mm | 50 | 25 | 19 | 3 |
| L880-36AUNRND | No |
|
880 | Mold | Φ3mm | 50 | 25 | 32 | 3 |
| L890-01AU | No |
|
890 | Mold | Φ5mm | 50 | 15 | 12 | 5 |
| L890-02AU | No |
|
890 | Mold | Φ5mm | 50 | 15 | 10 | 5 |
| L890-03AU | No |
|
890 | Mold | Φ5mm | 50 | 15 | 11 | 5 |
| L890-04AU | No |
|
890 | Mold | Φ5mm | 50 | 15 | 20 | 5 |
| L890-05AUNRND | No |
|
890 | Mold | Φ5mm | 50 | 15 | 44* | 5 |
| L890-06AU | No |
|
890 | Mold | Φ5mm | 50 | 15 | 10 | 5 |
| L890-09AU | No |
|
890 | Mold | Φ5mm | 50 | 15 | 10_21* | 5 |
| L890-33AU | No |
|
890 | Mold | Φ3mm | 50 | 15 | 15 | 3 |
| L890D-36 | No |
|
890 | Mold | Φ3mm | 50 | 25 | 49 | 3 |
| L890-36AU | No |
|
890 | Mold | Φ3mm | 50 | 15 | 30 | 3 |
| L910-01 | No |
|
910 | Mold | Φ5mm | 50 | 13 | 9 | 5 |
| L910-02 | No |
|
910 | Mold | Φ5mm | 50 | 13 | 3 | 5 |
| L910-03 | No |
|
910 | Mold | Φ5mm | 50 | 13 | 10* | 5 |
| L910-04 | No |
|
910 | Mold | Φ5mm | 50 | 13 | 15 | 5 |
| L910-05NRND | No |
|
910 | Mold | Φ5mm | 50 | 13 | 44* | 5 |
| L910-06 | No |
|
910 | Mold | Φ5mm | 50 | 13 | 3 | 5 |
| L910-09 | No |
|
910 | Mold | Φ5mm | 50 | 13 | 10_21* | 5 |
| L910-33 | No |
|
910 | Mold | Φ3mm | 50 | 15 | 15 | 3 |
| L910-36 | No |
|
910 | Mold | Φ3mm | 50 | 13 | 32* | 3 |
| L910D-33 | No |
|
910 | Mold | Φ3mm | 50 | 13 | 15 | 3 |
| L910D-36 | No |
|
910 | Mold | Φ3mm | 50 | 13 | 48 | 3 |
| L940-01AU | No |
|
940 | Mold | Φ5mm | 50 | 15 | 13 | 5 |
| L940D-02L6CU | No |
|
940 | Mold | Φ5mm | 50 | 30 | 3 | 5 |
| L940-01V | No |
|
940 | Mold | Φ5mm | 50 | 16 | 11 | 5 |
| L940-02AU | No |
|
940 | Mold | Φ5mm | 50 | 15 | 10 | 5 |
| L940-02V | No |
|
940 | Mold | Φ5mm | 50 | 16 | 3 | 5 |
| L940-03AU | No |
|
940 | Mold | Φ5mm | 50 | 15 | 13 | 5 |
| L940-03V | No |
|
940 | Mold | Φ5mm | 50 | 16 | 10* | 5 |
| L940-04AU | No |
|
940 | Mold | Φ5mm | 50 | 15 | 22 | 5 |
| L940-04V | No |
|
940 | Mold | Φ5mm | 50 | 16 | 20 | 5 |
| L940-05AUNRND | No |
|
940 | Mold | Φ5mm | 50 | 15 | 37 | 5 |
| L940-05VNRND | No |
|
940 | Mold | Φ5mm | 50 | 16 | 44* | 5 |
| L940-06AU | No |
|
940 | Mold | Φ5mm | 50 | 15 | 10 | 5 |
| L940-09AU | No |
|
940 | Mold | Φ5mm | 50 | 15 | 11_21 | 5 |
| L940-09V | No |
|
940 | Mold | Φ5mm | 50 | 16 | 10_21* | 5 |
| L940-31-2CNRND | No |
|
940 | Mold | Φ3mm | 50 | 14 | 52 | 3 |
| L940D-36 | No |
|
940 | Mold | Φ3mm | 50 | 30 | 42 | 3 |
| L940-33AU | No |
|
940 | Mold | Φ3mm | 50 | 15 | 25 | 3 |
| L940-33V | No |
|
940 | Mold | Φ3mm | 50 | 16 | 23 | 3 |
| L940-34AU | No |
|
940 | Mold | Φ3mm | 50 | 15 | 16 | 3 |
| L940-36AU | No |
|
940 | mold | Φ3mm | 50 | 15 | 37 | 3 |
| L940-36V | No |
|
940 | mold | Φ3mm | 50 | 15* | 37* | 3 |
| L940D-01 | No |
|
940 | Mold | Φ5mm | 50 | 30 | 11 | 5 |
| L940D-02 | No |
|
940 | Mold | Φ5mm | 50 | 30 | 3 | 5 |
| L940D-03 | No |
|
940 | Mold | Φ5mm | 50 | 30 | 11 | 5 |
| L940D-04 | No |
|
940 | Mold | Φ5mm | 50 | 30 | 10 | 5 |
| L940D-05NRND | No |
|
940 | Mold | Φ5mm | 50 | 25 | 45 | 5 |
| L940D-06 | No |
|
940 | Mold | Φ5mm | 50 | 30 | 3 | 5 |
| L940D-33 | No |
|
940 | Mold | Φ3mm | 50 | 30 | 16 | 3 |
| L940D-34 | No |
|
940 | Mold | Φ3mm | 50 | 25 | 5 | 3 |
| L970-01 | No |
|
970 | Mold | Φ5mm | 50 | 7 | 11 | 5 |
| L970-02 | No |
|
970 | Mold | Φ5mm | 50 | 7 | 10 | 5 |
| L970-03 | No |
|
970 | Mold | Φ5mm | 50 | 7 | 11 | 5 |
| L970-04 | No |
|
970 | Mold | Φ5mm | 50 | 7 | 18 | 5 |
| L970-05NRND | No |
|
970 | Mold | Φ5mm | 50 | 5.5 | 40 | 5 |
| L970-06 | No |
|
970 | Mold | Φ5mm | 50 | 7 | 9 | 5 |
| L970-09 | No |
|
970 | Mold | Φ5mm | 50 | 7 | 10_21* | 5 |
| L970-33 | No |
|
970 | Mold | Φ3mm | 50 | 7 | 22 | 3 |
| L970D-36 | No |
|
970 | Mold | Φ3mm | 50 | 28 | 50 | 3 |
| L970-36 | No |
|
970 | Mold | Φ3mm | 50 | 5.5 | 30 | 3 |
| L970D-02 | No |
|
970 | Mold | Φ5mm | 50 | 29 | 3 | 5 |
| L970D-03 | No |
|
970 | Mold | Φ5mm | 50 | 28 | 13 | 5 |
| L970D-04 | No |
|
970 | Mold | Φ5mm | 50 | 29 | 11 | 5 |
| L970D-05NRND | No |
|
970 | Mold | Φ5mm | 50 | 23 | 45 | 5 |
| L970D-06 | No |
|
970 | Mold | Φ5mm | 50 | 30 | 4 | 5 |
| L970D-33 | No |
|
970 | Mold | Φ3mm | 50 | 30 | 17 | 5 |
| L970D-34 | No |
|
970 | Mold | Φ3mm | 50 | 29 | - | 5 |
| L980D-01 | No |
|
980 | Mold | Φ5mm | 50 | 30 | 9 | 5 |
| L980D-02 | No |
|
980 | Mold | Φ5mm | 50 | 30 | 4 | 5 |
| L980D-03 | No |
|
980 | Mold | Φ5mm | 50 | 30 | 12 | 5 |
| L980D-04 | No |
|
980 | Mold | Φ5mm | 50 | 30 | 3 | 5 |
| L980D-06 | No |
|
980 | Mold | Φ5mm | 50 | 30 | 4 | 5 |
| L980D-36 | No |
|
980 | Mold | Φ3mm | 50 | 30 | 50 | 5 |
NRND: Not Recommended for New Design
IR & NIR LEDs – High-Efficiency Infrared Emitters (700 nm – 1050 nm)
Infrared (IR) and near-infrared (NIR) LEDs emit light just beyond the red end of the visible spectrum, where the eye’s sensitivity falls off steeply. IR LEDs have been used for decades in everyday devices like TV remote controls (typically around 940 nm), and today they also power advanced systems in security, communications, and sensing. Notably, nearly half of the Sun’s energy reaching Earth is in the infrared – illustrating the abundance and utility of IR light. The CIE divides infrared radiation into three bands: IR-A (near-infrared) from 780 to 1400 nm, which includes most night-vision and biometric illumination; IR-B from 1400 to 3000 nm, used in applications like telecommunications and moisture sensing; and IR-C from 3 µm to 1 mm, the range of thermal imaging. Marubeni’s IR & NIR product line covers 700 to 1050 nm, from the far-red edge into the shorter-wavelength part of IR-A (for 1050 to 1900 nm, see our SWIR LED offerings).
Why Choose Marubeni for Near-Infrared?
High radiant output
Our IR/NIR LEDs deliver exceptional optical power, with some emitters achieving up to 5–6 W of output in compact packages (plenty for long-range floodlights and illuminators). Using advanced chip designs and thermal packaging (such as our ceramic SMBB 5 × 5 mm and EDC 3.5 × 3.5 mm devices), we offer intense infrared illumination from a small footprint.
Tight wavelength binning
We offer standard NIR LEDs at key wavelengths – for example 730 nm (far-red), 780 nm, 810 nm, 850 nm, and 940 nm – each sorted in narrow wavelength bins (typically ±5 nm). This tight binning ensures uniformity and repeatability in sensor designs, especially important for applications like biometrics or structured-light systems that demand a specific IR wavelength.
Scalable thermal solutions
Marubeni provides infrared emitters in formats suitable for both small and large-scale deployments. For board-level and wearable devices, we have low-profile surface-mount LEDs (with heat-spreading substrates) that integrate easily. For high-power requirements, we offer components like TO-66 metal-can arrays and custom multi-LED illuminators, which can handle higher drive currents and dissipate heat efficiently, enabling use as flood lights or long-range IR spotlights. For example, our multi-die IR illuminators in TO-66 cans combine several chips behind an optical window to produce an exceptionally high-intensity beam for surveillance or machine vision.
Applications of IR & NIR LEDs
Security and biometrics
High-power 850 nm and 940 nm LEDs are widely used for CCTV security cameras, covert illuminators, and facial recognition systems, and automatic license plate recognition (ANPR) for traffic monitoring. Our NIR LEDs serve as floodlights that allow night-vision cameras to capture clear images in complete darkness. They are also used in biometric identification like iris scanners and eye-tracking systems (for VR headsets or driver monitoring), providing near-infrared light to track eye movement or authenticate users.
Medical devices
NIR LEDs are widely used in health monitoring instruments. 940 nm IR emitters, paired with red LEDs, are the basis of pulse oximetry sensors that measure pulse (heart rate) and blood oxygen saturation (SpO2) in wearable devices and hospital monitors. Additionally, arrays of 850 nm and 810 nm LEDs are used in photobiomodulation research. Designers qualify LEDs for their application; see the datasheet notes on intended use.
LiDAR and range-finding
Infrared LEDs (often 905 nm or 940 nm) and laser diodes are used in time-of-flight rangefinders, LiDAR sensors, and proximity detectors. Marubeni’s high-efficiency IR chips enable these systems to send out powerful pulses of light and accurately measure distances for applications such as automotive LiDAR and robotics navigation. NIR wavelengths are also used in consumer electronics (e.g. structured-light 3D cameras in smartphones) as well.
Industrial sorting & sensing
IR and NIR LEDs help automate quality control by detecting material properties invisible to the human eye. For instance, 740–980 nm illumination is used to differentiate plastics or to sense moisture content on production lines (water absorbs specific NIR wavelengths). In food processing, 850 nm LEDs can assist in sorting produce or grains by detecting surface characteristics. Our infrared emitters offer the reliability and fast switching needed for these high-speed machine vision systems.
Environmental & consumer sensors
Infrared LED-based sensor pairs are common in smoke detectors, where an IR LED and photodiode work together to detect airborne particles (smoke) via light scattering. IR proximity sensors are also used in consumer electronics – for instance, helping smartphones detect when they are near your face or enabling touchless gesture controls. Our IR emitters provide reliable, low-noise output for these safety and convenience applications.
Together, these applications demonstrate the versatility of Marubeni’s IR/NIR devices – from enabling safer cities with IR surveillance to advancing healthcare and industry with precise infrared sensing. If your project requires wavelengths above ~1000 nm (such as 1050 nm, 1300 nm, or 1550 nm), please explore our complementary SWIR LED chips for extended infrared coverage. Whatever your infrared illumination needs, Marubeni provides a solution backed by our technical expertise and commitment to quality.
IR & NIR LED FAQ’s
What is NIR LED technology?
NIR LED technology refers to light-emitting diodes that operate in the near-infrared spectrum. The CIE defines near-infrared (IR-A) as 780 to 1400 nm; Marubeni’s NIR LEDs cover 700 to 1050 nm. These LEDs are energy-efficient light sources that can penetrate various materials, making them suitable for applications such as sensing, imaging, and communication.
How do NIR LEDs compare to traditional infrared light sources?
NIR LEDs offer several advantages over traditional infrared light sources. They are more compact, energy-efficient, and have a longer lifespan. Additionally, NIR LEDs can provide better sensitivity and accuracy in applications such as detection and measurement, especially in the near-infrared range.
What are the common applications of NIR LEDs?
NIR LEDs are widely used in various applications, including medical devices for biological detection, industrial sensors for gas and chemical analysis, and in R&D for optical measurement. Their ability to operate in the near-infrared spectrum enables them to perform tasks that visible light cannot, such as penetrating certain materials without causing damage.
What is the wavelength range of NIR LEDs?
Marubeni’s IR & NIR LEDs span 700 to 1050 nm (the CIE’s near-infrared band, IR-A, is 780 to 1400 nm). Commonly used wavelengths include 740nm, 850nm, and 940nm. Each wavelength has its specific applications and advantages based on the conditions and materials being analyzed or illuminated.
Can NIR LEDs be used for biological and chemical detection?
Yes, NIR LEDs are highly effective for biological and chemical detection. Their ability to penetrate tissues and materials allows for non-invasive measurements. This makes them suitable for medical diagnostics, environmental monitoring, and chemical analysis.
What are the advantages of using NIR LEDs in lighting?
NIR LEDs provide several advantages in lighting applications, including lower power consumption, enhanced reliability, and the ability to operate in conditions where visible light may not be effective. They can optimize energy efficiency while providing illumination in specific wavelengths outside most of the eye’s sensitivity.
How do you measure the performance of NIR LEDs?
The performance of NIR LEDs can be measured in terms of output power, efficiency, and wavelength stability. Analytical techniques are used to assess their sensitivity and accuracy in various applications, ensuring they meet the required specifications for detection and measurement tasks.
Are there any safety concerns associated with using NIR LEDs?
LEDs fall within the scope of IEC 62471, the photobiological safety standard for lamps and lamp systems. Marubeni’s handling and use precautions note that its products may fall under Risk Group 2 of IEC 62471 depending on the conditions of use. Avoid looking directly into operating emitters, and follow the datasheet and precautions page.